There's a famous quote by English architect and designer William Morris that goes, "Have nothing in your house that you do not know to be useful, or believe to be beautiful". This sentiment has long informed my decorating style, as well as the choices and advice I provide to my interior design clients, especially when it comes to decorating the "utilitarian" areas of their living spaces. In fact, I believe in taking Morris one step further by striving to ensure that nothing useful in the home lacks for beauty. This article will focus on two such oft-neglected areas of the home, the laundry room and the bathroom, and will provide some ideas that will hopefully inspire you to take the next steps in achieving what I like to call "functional beauty".
When I moved into my first apartment as a single woman, I remember being confronted with ugly utilitarian bi-fold doors that camouflaged the laundry area (it was nothing so grand as a laundry "room"). I was disappointed. After all, doing laundry is enough of a chore without the uninspiring surroundings. Still, I learned to live with the functional if unattractive feature for two primary reasons: 1) I knew that as a renter my options were limited; and 2) I knew that my presence in that apartment was temporary.
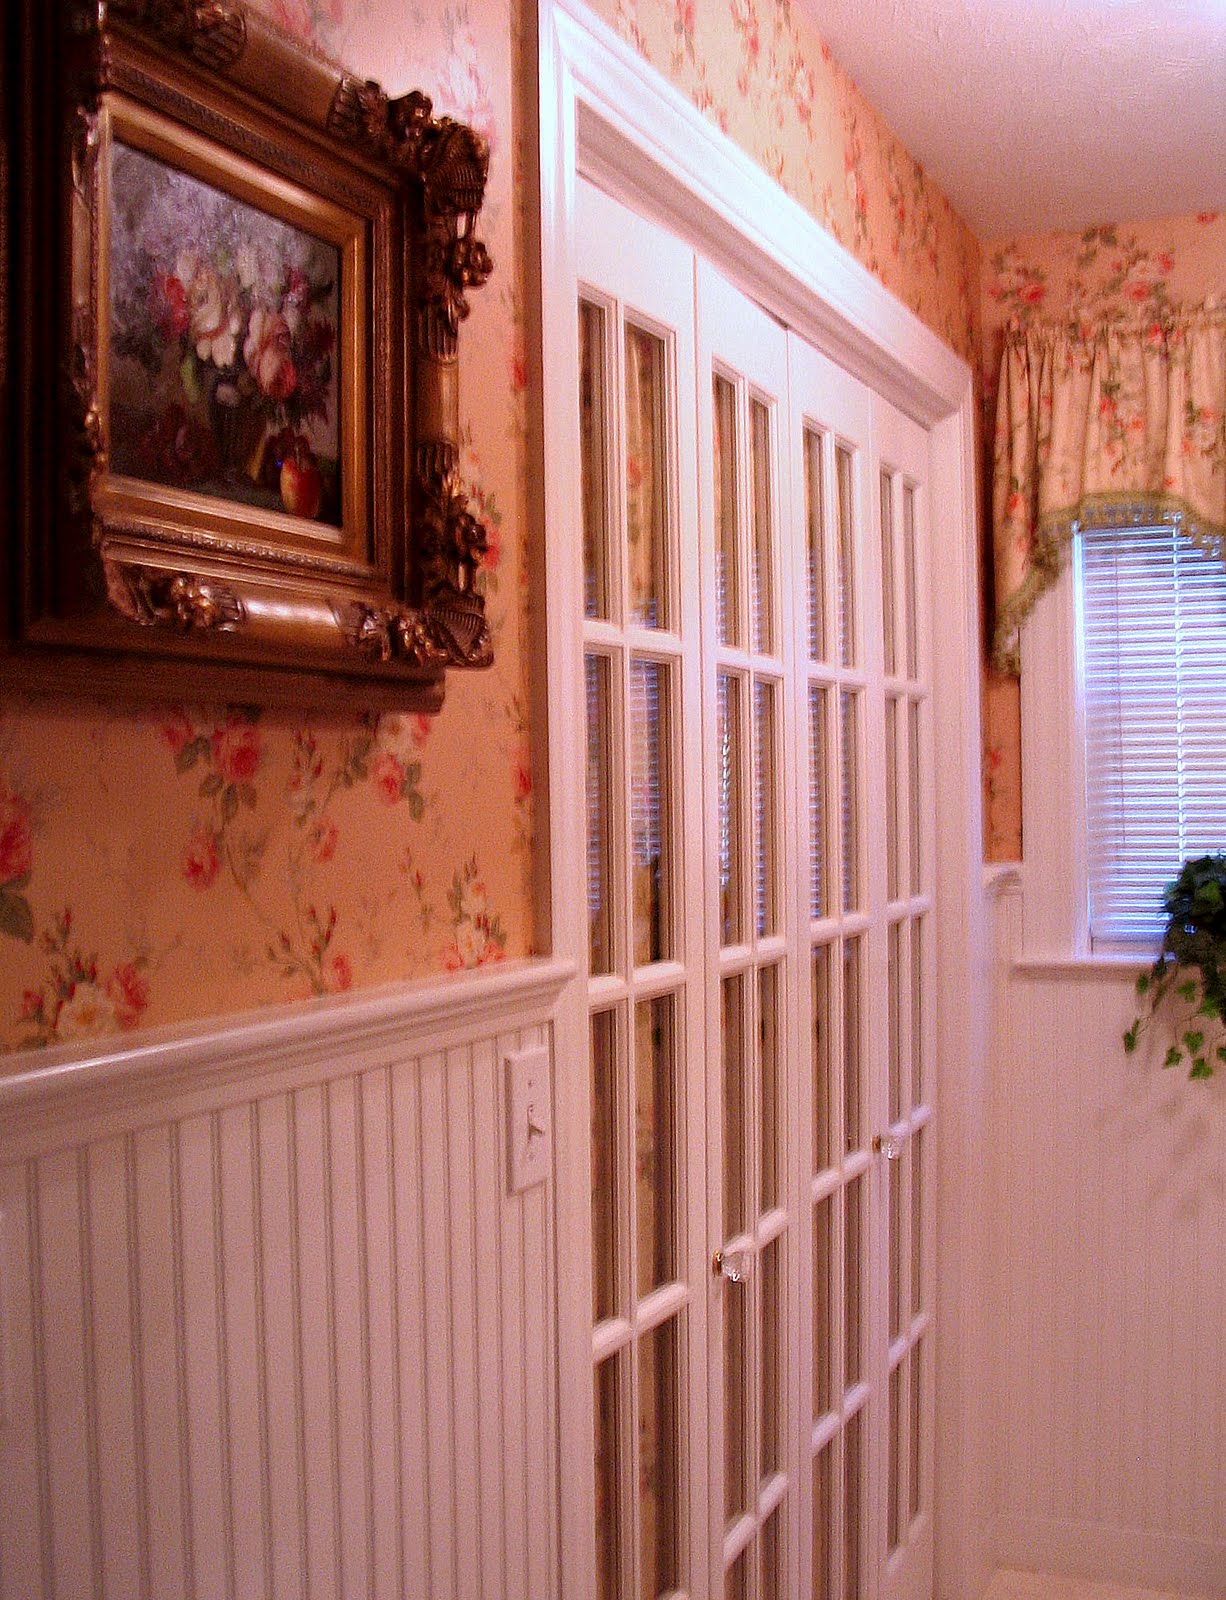
However, I had a different mindset when my husband and I moved into our first house. This time, when I saw

the same type of ugly modular bi-fold doors closing off the washer and dryer in my new laundry room as had "graced" my former apartment, I knew that I had an opportunity to make that room my own, and that's exactly what I did. Out came the ugly particle board doors and in their place we installed beautiful French bi-fold doors (see photos to the left and below). These particular doors came unfinished, but with a new coat of paint, some lovely fabric to line the windows, and elegant crystal doorknobs, they became a functional AND beautiful element to what could have been a dull and dreary workspace. As you'll note, the fabric lining I chose for the doors matches the window valance and the wallpaper in the room. This not only gives the room a cohesive designer look, but also ensures that the small room is not crowded by a cacophany of mixed patterns. In a similar vein, this room has white bead-board wainscoting. The wainscoting serves the dual purpose of not only protecting the walls against dings from wayward laundry baskets and clothes hangers, but also adds some visual white space that allows the eye a place to "rest" so that the pattern in the room does not become visually overwhelming.
It's somewhat unusual to find French bi-fold doors in today's decor, but they make a really nice architectural feature and are surprisingly versatile.
For example, in addition to their use in a laundry room like this one, consider using a single bi-fold door for a standard size closet, or double doors (as pictured here) for wider closet openings. Or, if you're feeling creative, French bi-fold doors make a lovely room divider (or even freestanding headboard) as well. Just hinge a couple of pairs together, paint in a color that complements your existing decor, and line with a fabric you like and you're good to go. Or, if you prefer to forgo the fabric so as to let in more light (in the case of a room divider), then just paint the frames and mullions, or combine paint with frosted-glass window panes. There are plenty of do-it-yourself window frosting and etching kits available from which you can choose.
The laundry room is just one of the utilitarian areas in your home that all too often is either ignored entirely or decorated with a lack of imagination. Another area is the bathroom. But as you will now see, that doesn't have to be the case.
For instance, the bathroom in the picture to the left is very functional but still reflects the elegant taste of the homeowner (as well as her love of long soaks in the tub). The architectural features of the space, including paneled wainscoting, large windows, marble floors and shower stall, and gas fireplace installed right on the tub deck, all lay the foundation for the luxurious design.
But what especially sets this bathroom apart are the decoratively functional details that are
used in unusual ways. For instance, a gorgeous Oriental area rug in muted tones (as in the picture to the right) serves as an exceptional and interesting alternative to the standard bath mat. You'd be surprised how rugged these types of rugs actually are, but remember that they are routinely used in foyers as a place where guests wipe their wet and muddy shoes. If a rug is tough enough to withstand such rough use, it's certainly tough enough for your bathroom floor.
Likewise, be aware that when it comes to choosing vanities and cabinetry for your bathroom, you are not limited to what is available in the bathroom department of your local home store. Think outside the box.
The cabinetry in this bathroom (including the vanity pictured left and the armoire pictured above) is actually "semi-custom", meaning it was assembled from modular parts to my chosen design. Elements such as raised and recessed panels, fluted pilasters that mirror those of the fireplace mantel, carved rosettes and bun feet give these pieces the look of fine furniture. Additionally, these particular items were selected from the kitchen cabinetry collection of a local home improvement store, an added benefit of which is that the countertops are higher than is standard with bathroom cabinetry. This bathroom originally had a built-in closet, but the homeowner elected to remove the closet and go with a storage armoire instead. The armoire takes up less floor space (and is actually a more efficient use of space) and also serves as a beautiful piece of furniture.
Finally, the lighting in this bathroom is anything but typical and is a far cry from the "broadway marquee"
bulbs that often grace the average American bathroom. The crystal chandelier over the tub, atypical gold-finished sconces attached directly to the oversized mirror, and art lighting are all on dimmer switches, allowing for variations in mood and impact. Overall, the effect is an elegantly appointed bathroom whose lighting is more typical of that seen in high-end living rooms and bedrooms.
Other decorative elements that add high style to this bathroom include:

- Architectural elements and onlays on the fireplace surround;
- Rich chocolate-brown wall color that contrasts nicely with the ivory of the room's fixtures, architectural panels, and gold frames of the artwork;
- Silk window treatments;
- Gold-framed oil paintings (also a nice choice for laundry rooms and kitchens!);
- Elegant silk drapery panel with tassel tieback on the glass shower enclosure;
- Candles and candleholders on the fireplace mantel; and
- Throw pillows on the tub deck.
ADDITIONAL TIPS AND SUGGESTIONS
- If you do elect to have a crystal chandelier (or any other light fixture) above your tub, be sure to check local building codes for safety requirements.
- Silk is tougher than you might think. The silk window treatments in the bathroom featured above have been in place for about four years now and are still going strong. I would recommend, however, that if you do choose to use silk in your bathroom that you first be sure that you have adequate ventilation (to prevent damage from excessive moisture) and that the silk is not exposed to excessive direct sunlight (especially late-day sun).
- Pillows on the tub deck are a great way to soften the otherwise hard surfaces of a bathroom and add a homey touch. If you're anything like me, you like to take long baths in the winter but not so much in the summer. If you elect to use pillows around your tub, I'd suggest using them only during the summer months so that they don't get in your way during bath "season". The pillows featured above are made from a paisley chintz, but there is a wide variety of "outdoor" fabric available these days from manufacturers like Sunbrella that is resistant to moisture and mildew.
- Even if you have a glass shower enclosure and don't really "need" a shower curtain, consider putting a curtain on the outside of the enclosure to soften the hard lines and angles. The curtain would be strictly decorative, but don't worry too much about whether or not the fabric is washable. After all, you would be hanging the curtain on the outside of the stall and so it will be protected from direct contact with water (I'd recommend using curtain rings to hang the curtain from a swing-arm curtain rod attached directly to the wall).
- If you elect to go with a non-conventional area rug in your bathroom (such as the Oriental style pictured above), just be sure you include a non-skid pad underneath for safety's sake.
- Kitchens are another area that can be all too cold and uninviting. Try warming your kitchen up by using select pieces of furniture placed strategically in combination with your more traditional cabinetry. For instance, a client of mine has an antique maple bureau in her kitchen that houses her table linens and accessories, as well as an old painted armoire that stores her dishes. The look is inviting and makes the kitchen's decor more in line with that of the rest of the home.
- If your kitchen is large enough and well-ventilated, consider using an elegant and unusual fabric to cover the chair seats of your dining table. You will eventually need to re-cover, but this is usually an easy and inexpensive task that you can do yourself. In the meantime, the unusual and unexpected choice will look rich and scrumptious.
- I love crystal chandeliers and try to use them wherever possible. If the ceiling height allows, try using a petite chandelier in your powder room. Or, you could even hang one over the crib in your baby's room! (Believe me, she (or he!) will thank you later.)
CONCLUSION
I've always been of the mindset that there is no reason why every room in your house can't reflect your personal taste and decorating vision. Remember that functional doesn't have to mean boring. Try "thinking outside the box", taking some of the tips I've suggested here and applying them to your own lifestyle. You'll be amazed what you can do.
Copyright 2010 - All rights reserved - Pamela Yeaton