Friday, April 23, 2010

Details, Details, Details

I once had a client who bought a very expensive lamp simply because she liked the finial.  Granted, the finial was a very beautiful and intricately carved jade bauble, but nothing that couldn't have been purchased separately and retro-fitted onto a less expensive lamp (or one that she already had in her home).  I suppose that she understands that now, but her story is a perfect example of just how important details like lamp finials can be to a room's overall design.

I myself have always been a stickler for details when it comes to decorating.  Details add personality, depth and texture to a room, enhancing your décor when used properly.  However, you need to walk a fine line with them: Used inappropriately, they'll overwhelm and be a distraction.   I often compare this delicate balance to accessorizing an outfit:  Too little and the outfit looks unfinished; too much and the outfit is a busy mess.

There is an infinite variety of detailing that you can use to add spark to your décor.  Finials, fan pulls, tassels and trims, decorative buttons, cabinet knobs, cord covers and drapery hardware are just a few of the options.  While this article focuses on only a small percentage of these, you owe it to yourself to have some fun exploring the many details of distinctive design.


DOOR KNOBS AND CABINET PULLS

Some of my favorite details for adding interest and expressing personality are door knobs, cabinet pulls and drawer pulls.  This is a great way to update and spruce up old cabinets or a tired piece of furniture without spending a lot of money.  I personally love crystal doorknobs like the one in the picture to the right and use them wherever possible to add a touch of sparkle to otherwise plain doors.

Much like lamp finials, doorknobs and cabinet knobs/pulls of all styles are readily available online and range from traditional to whimsical (in shapes like fish, eating utensils (as for kitchen cabinets and drawers) and flowers).  You can use such hardware to complement your furniture style with classic Queen Anne, Chippendale or Hepplewhite detailing, or you can use knobs that deliberately contrast with your furniture to make a bold statement.

One chic look that I especially like is using crystal drawer knobs on an old bureau or table that's been painted and then sanded or given a crackle finish.  The contrast between the weather-worn finish of the furniture and the elegant sparkle of the crystal is unexpected and enchanting.  I also like to use colored knobs for a more whimsical look.  In the photo to the left, the blue glass “melon” knob adds a bright pop of color against the white surface of these French bi-fold closet doors in a client's home office.  The deep blue also picks up the blue in the country French fabric lining the door.


TASSELS AND TRIMS

Another fun and effective way to add detail to a room is with tassels and trims of all sorts (also known as “passementerie”), and the options are almost limitless.

For instance, rope trims offer a nice alternative to welting on pillows, box cushions and table skirts and add color and texture.   Gimp (or flat trim) is a great option for use with window treatments and bedding.  In fact, I like to use gimp for areas that get a lot of incidental contact because these types of trims aren't prone to unraveling (unlike a tassel trim, for example).  Gimp is also good for use as a border for drapery panels (and requires less sewing skill than does using a contrasting fabric border).

For an especially elegant look, try a breaded trim.  In the table runner in the photo to the right, the woven trim and the jewel-like beads complement both the color and period look of the antique toile fabric.  When I designed this runner (and its coordinating table topper), I fancied it a detail that would've been right at home adorning the boudoir of Catherine the Great (or some other decorating diva!).
Besides looking great, trims can also serve functional purposes as well. For instance, the tassel trim featured on the ottoman to the left is not only timeless in its appeal; it also effectively covers the ottoman's horizontal seams.  One of the additional things I like about this trim is the way it mirrors all of the vibrant colors of the ottoman's fabric without competing with or overwhelming it.  Because the fabric is and should be the focal point of this piece, the trim's effect is subtle, serving to add depth and texture to the piece. 


 Tassels can be simple and monochromatic or elaborate, multi-colored works of art (and they are priced accordingly).  In addition to the traditional “key tassel” like that pictured to the right, one of these more elaborate “statement” tassels can be used as a drapery tieback.
For a special touch, try using chair ties and tassels on the arm chairs of your dining room set.  In the photo to the left, I especially like the way this chair tie plays off the chair's seat fabric and enhances the whole look.  This homeowner was so enamored with the look that she initially wanted to put similar ties on all of her dining chairs.  Ultimately, though, she agreed that the ties were more effective when used only on the table's arm chairs because they further set these more elaborate chairs apart from the simpler side chairs.  In decorating, as in other areas of life, it's important that you know when to say when.

Generally, the selection of trims that you will find in stock at the fabric store represents a very small percentage of the choices available through custom order.  If you have the time and patience, it's well worth the effort to pore through some of these custom choices (or have your decorator do it for you!).  Many are only available “to the trade”, but it's relatively easy to find a dealer through whom you can purchase such trims.  There are some great online sources where you can get more information about the many trim and tassel styles available.  Check out the “Resource Guide” below for a few of these sources.


CONCLUSION

Details can be one of the most fun and rewarding aspects of decorating a room.  Whether you apply these details to a completely custom design or to a mass-produced store-bought window treatment, any door, cabinet, dining chair, light fixture, drapery or upholstered furniture piece is an opportunity for embellishment that reflects your special style stamp.   Give it a try.


ADDITIONAL TIPS AND SUGGESTIONS:

  • Use cord covers on hanging light fixtures to hide the fixture's electrical cord and chain and to add some subtle drama (as with a cord cover in a sassy cheetah print).  If you elect to purchase the cord cover (as opposed to sewing one yourself), just be sure to buy the type with an open vertical seam that closes with Velcro, allowing you to put the sleeve on without having to remove the chandelier from the ceiling.
  • Where possible, install “rim locks” on your interior or screen doors.  Rim locks are locks and plates that are fixed to a door's surface instead of being mortised inside the door and they can be quite elegant for a traditional home, providing some historic detailing.  However, rim locks are not really designed for or adequate as a security lock.  Therefore, they should only be used for interior doors or for decoration on an exterior door where there is another device for security purposes (such as a deadbolt).
  • If you have bought pre-made pillows from the store that could use some pop or if you have plain matching pillows that came with your sofa, try hand-sewing or even hot-gluing on tassel trim or gimp for some added personality.
  • If you have a store-bought throw or bedspread, sew some bullion fringe around the edges for a more luxurious look.  Bullion fringe is also a great choice for trimming the kick-pleats on a sofa or for detailing an upholstered ottoman.
  • Use “key” tassels on china cabinet doors or decorative boxes.
  • Purchase inexpensive carved wood cabinet knobs and gold leaf or silver leaf them with liquid leaf.  The look will be richer and more textured than knobs with a plain metal finish.
  • Note that if you use a rope trim with a “lip” attached to it, it will be easier to sew between your seams with a sewing machine (as opposed to a rope trim without a lip, which needs to be hand-sewn on top of the fabric).
  • Use decorative buttons (store-bought or custom fabric-covered) to add detail to window treatments, to closures on duvet covers, and to tufted ottomans, pillows and cushions.
  • Use pleated trim to add nice depth and texture to the edges of duvet covers, coverlets and pillow shams.
  • Fluted drapery rods with intricately carved finials like that pictured to the left and fabric rosettes

    like that attached to the valance to the below right will add designer detail to a window treatment, taking it to the next level.  You spend a lot of time and money designing your window treatments and bringing them to life with carefully-chosen fabrics.  Add some details like these and your investment will be apparent (and well worth it).


RESOURCE GUIDE:

Knobs and pulls:

myknobs.com
coolknobsandpulls.com
Emtek (doorknobs)
Amazon
Anthropologie (great source for quirky, unusual cabinet knobs and drawer pulls).


Fan Pulls:
lampfinials.com


Cord covers:
Ballard Designs
Shades of Light


Lamp Finials:
Pronto.com
Lamps USA
lampfinials.com
Tassels & Trims (stunning selection)


Trims:
Decorative Fabrics Direct 
Tassels & Trims (to the trade only)
Interiormall.com
Kravet  (to the trade:  doesn't sell to the consumer directly)
The Curtain Rod Shop (drapery hardware, finials, trims, tiebacks)


Rim Locks:
Baldwin Brass Hardware
House of Antique Hardware
Historic Home Hardware
Copyright 2010 - All rights reserved - Pamela Yeaton

Saturday, April 17, 2010

PDQuick! Designer Look Bedsheets on a Budget

PDQuick Tip:  To save money but still have your bedding look expensive and luxurious, purchase inexpensive flat and fitted sheets for your bed and then splurge on the fancier designer pillow cases.  When the bed is made, only the pillow cases will be visible, so spend your money on something with delicate embroidery or an especially pretty pattern or detail.  Or, as an alternative, you can even buy the less expensive pillow cases and then embellish them yourself with lace, appliques, needlepoint (if you're good at that) or decorative buttons.

As an additional suggestion, it's a good idea when purchasing bedsheets to buy two sets of pillowcases.  Pillowcases, because they get the most wear, are quicker to become soiled and worn out.  By having two sets, you'll extend the life of your sheets.
Copyright 2010 - All rights reserved - Pamela Yeaton

Friday, April 9, 2010

PDQuick! A Room in a Bag

PDQuick Tip:  Has this ever happened to you?  You go into a store, see a fabric you love and that you're sure will complement your existing style, only to get it home and find that it clashes with the other fabrics in the room or the wall color.  Decorators know that choosing new accessories and details for a room can be frustrating if you're not adequately prepared and organized when you go out shopping, so try using a more portable version of the interior decorator's sample board.

To keep yourself organized, prepare a clear plastic "sample" bag for each room in your home (I like Ziploc freezer bags, because they're good size and re-sealable).   Label the outside of each bag with the applicable room name (e.g., master bedroom, kitchen, etc.) and any additional information about the room you might need (such as the name of the wall paint color and the paint manufacturer).  Fill the bag with fabric samples from the room, along with samples of trims, rugs, paint chips, even tile (all preferably with information about the manufacturer).  Whenever you go out shopping for your home, bring along your "room in a bag" and you'll be able to make your selections with confidence.  Also, if your home has an open floor plan, bring sample bags for the surrounding rooms as well to ensure that your choices will all coordinate accordingly.

As an additional suggestion, do collect samples of everything you can when decorating your home.  Fabric and trim samples are easy to get, but some places (especially mail-order and online sources such as Ballard Designs) will even provide samples for area rugs, while others will provide samples for tile, flooring and marble countertops.  All will help to make your future shopping trips more productive, and who doesn't want that?
Copyright 2010 - All rights reserved - Pamela Yeaton

Friday, April 2, 2010

Interior Lighting Design

 Just as lighting can be one of the most significant factors in looking your best, the lighting in your home can either show your house to its best advantage or be uninteresting and unflattering.
Light can be used to banish the darkness from cold and unfriendly corners or to highlight objects of beauty.  Used effectively, creative and proper use of lighting is an integral part of interior design, providing great atmosphere and interest to any room.


TYPES OF LIGHTING

Generally speaking, the types of interior lighting can be grouped into the following three categories:  General, task and accent.

General Lighting
General lighting is typically characterized by ceiling fixtures.  This lighting is designed to provide overall illumination to an entire room, literally allowing you to move around without bumping into things.  Examples of general lighting would be chandeliers, pendant lights, flush-mounted fixtures, recessed lighting, and electric wall sconces.

Of course, just because general lighting is functional doesn't mean it can't be beautiful and allow you to put your own stamp on it.  If your style is elegant and romantic, feature a crystal chandelier.  If your home is more rustic or “country” in style, wrought iron is a wonderful choice.  Do bear in mind, however, that while general lighting is obviously functional and the fixtures themselves can be quite distinctive, such lighting can be “flat” and cast harsh shadows.  Ever notice how unwelcoming and glaring the light from a ceiling fixture can be and wonder why so much wattage still doesn't seem to be enough to really provide the light you need?  This is because in addition to the basic necessity of general lighting, your room needs additional lighting that is specifically designed to enable specific activities or “tasks”.  This is where task lighting comes in.
 
Task Lighting
Task lighting, as the term suggests, is designed to allow you to do close work that requires more focused illumination than can be provided by general lighting.  Examples of task lighting would be table lamps, floor lamps, swing-arm lamps and buffet lamps.  Such lighting is ideal for reading, sewing, needlework, doing crossword puzzles, etc.  “Spot lights” that are often found in kitchens and over kitchen islands are good task lights for illuminating food preparation.

Fixtures for both task and general lighting can be works of art in themselves and a focal point within your room.  For accent lighting, on the other hand, the focus is all about what's being highlighted and not the light fixture itself.

Accent Lighting
Accent lighting highlights the beauty of the objects in your home, including accessories, architectural features, even potted plants.  As such, it's one of the most fun aspects of decorating and can take a room from unremarkable to unforgettable.  Unfortunately, accent lighting is also probably the most underutilized by homeowners.  Anywhere in your home with an object to be spotlighted or a dark corner to be brightened is an opportunity for accent lighting.

Uplights
One example of accent lighting is “uplights”, which are portable spotlights that typically sit on the floor and send a wash of light upward, allowing the space above to be highlighted.  Uplights are often used with potted plants, but they're also nice when tucked in a dark corner on the floor behind a chair or when they are placed to highlight the fabric of your window treatments (especially nice when you have silk draperies, for instance).  Just note that uplights can get quite hot, so be sure to keep some space between the light fixture and the objects around it to allow for sufficient air circulation.

Lighting Artwork
Another great use for accent lighting is an “art light” or an “eyeball” ceiling spot light that is used to highlight artwork.  Art lights attach right to the frame of your artwork or to the wall above; they are also available in a freestanding form that sits below the painting and highlights upward.   Art lights are not only desirable but also downright necessary if you have a dark oil painting, allowing you to see the rich detail of the painting without having to turn up the wattage (and glare) on your general lighting.  In fact, at night it's quite beautiful to see a piece of artwork that is highlighted with an art light while the rest of the room is in darkness.

One of the nice things about art lights is their portability, especially if you elect not to “hard-wire” the fixture and just run the cord behind the artwork and plug it into a nearby outlet.  Just be sure that the style of the fixture itself is consistent with the style of painting (contemporary versus traditional, for example).  Also, be sure that the art light is an appropriate size for the framed painting and that its finish blends in with the frame, as you don't want the fixture to overshadow the painting.  There are many styles and finishes of art lights available.  They can run from twenty or thirty dollars to several hundred dollars.  (See the “Resource Guide” at the end of this post for information about art light distributors and manufacturers.)

A different option for highlighting artwork is with what is called an “eyeball” spotlight that is recessed and mounted in the ceiling (see picture highlighted by an eyeball spotlight in the photo to the left).  These fixtures are called “eyeball” because while they are otherwise recessed in the ceiling, the bulb itself protrudes and can be moved in different directions, giving some additional flexibility.  This is a good option for a hallway, for example, because the light fixture itself will not intrude into the visual or actual physical space of the hallway.

Do bear in mind when choosing an accent light fixture for showcasing artwork that your ultimate choice might be influenced in part by the finish of the painting (e.g., whether it's a matte or shiny surface) and whether it is covered with glass or not.  Paintings today are sometimes protected with glass that has a non-glare surface, but the overall impact of the surface can be to “dull-down” the painting itself, an effect that can be made worse by placing a light directly on the glass.  In contrast, sometimes an older painting won't have the non-glare surface on the glass, but the glare from any light shining on the picture directly makes it very tricky to light such artwork effectively.  If this is the challenge you are facing and you definitely want to use a spotlight or art light, then consider removing the glass entirely.  I've done this in the past and it was absolutely the correct solution.  When making your choice for illuminating your artwork, bear in mind the investment you have already made in the artwork itself and decide accordingly.

Other Options for Accent Lighting
As mentioned earlier, accent lighting is a great way to highlight architectural detail in your home.  If you have recessed wall niches, for instance, spotlights or low-voltage “strip” lighting will highlight the objects within.  Meanwhile, “cove lighting”, which is typically concealed within a ledge, cornice or crown molding at the upper part of the wall, is a terrific way to bring subtle light to a ceiling.  The effect is especially beautiful if you have an unusual or detailed ceiling and wish to draw attention to it.   Recessed lights can also be used to highlight the interior space of a bay window area or a window seat.

Other examples of accent lighting include lighting inside glass cabinets (see photo to the right).  I especially love to highlight beautiful dishes and stemware with “puck lights” (although if you're lucky, your china cabinet already comes wired for lighting).  Secretaries are another candidate for accent lighting (assuming the cabinet portion of the piece has glass doors, of course).  And don't forget about candles!  Candles are an easy, inexpensive way to add an atmospheric glow to any space.


CROSS-FUNCTIONS

To get the maximum potential out of your decorating, your home should include some combination of all three types of lighting (preferably in each room).  While the categories are fairly well-defined, they do in some cases overlap.

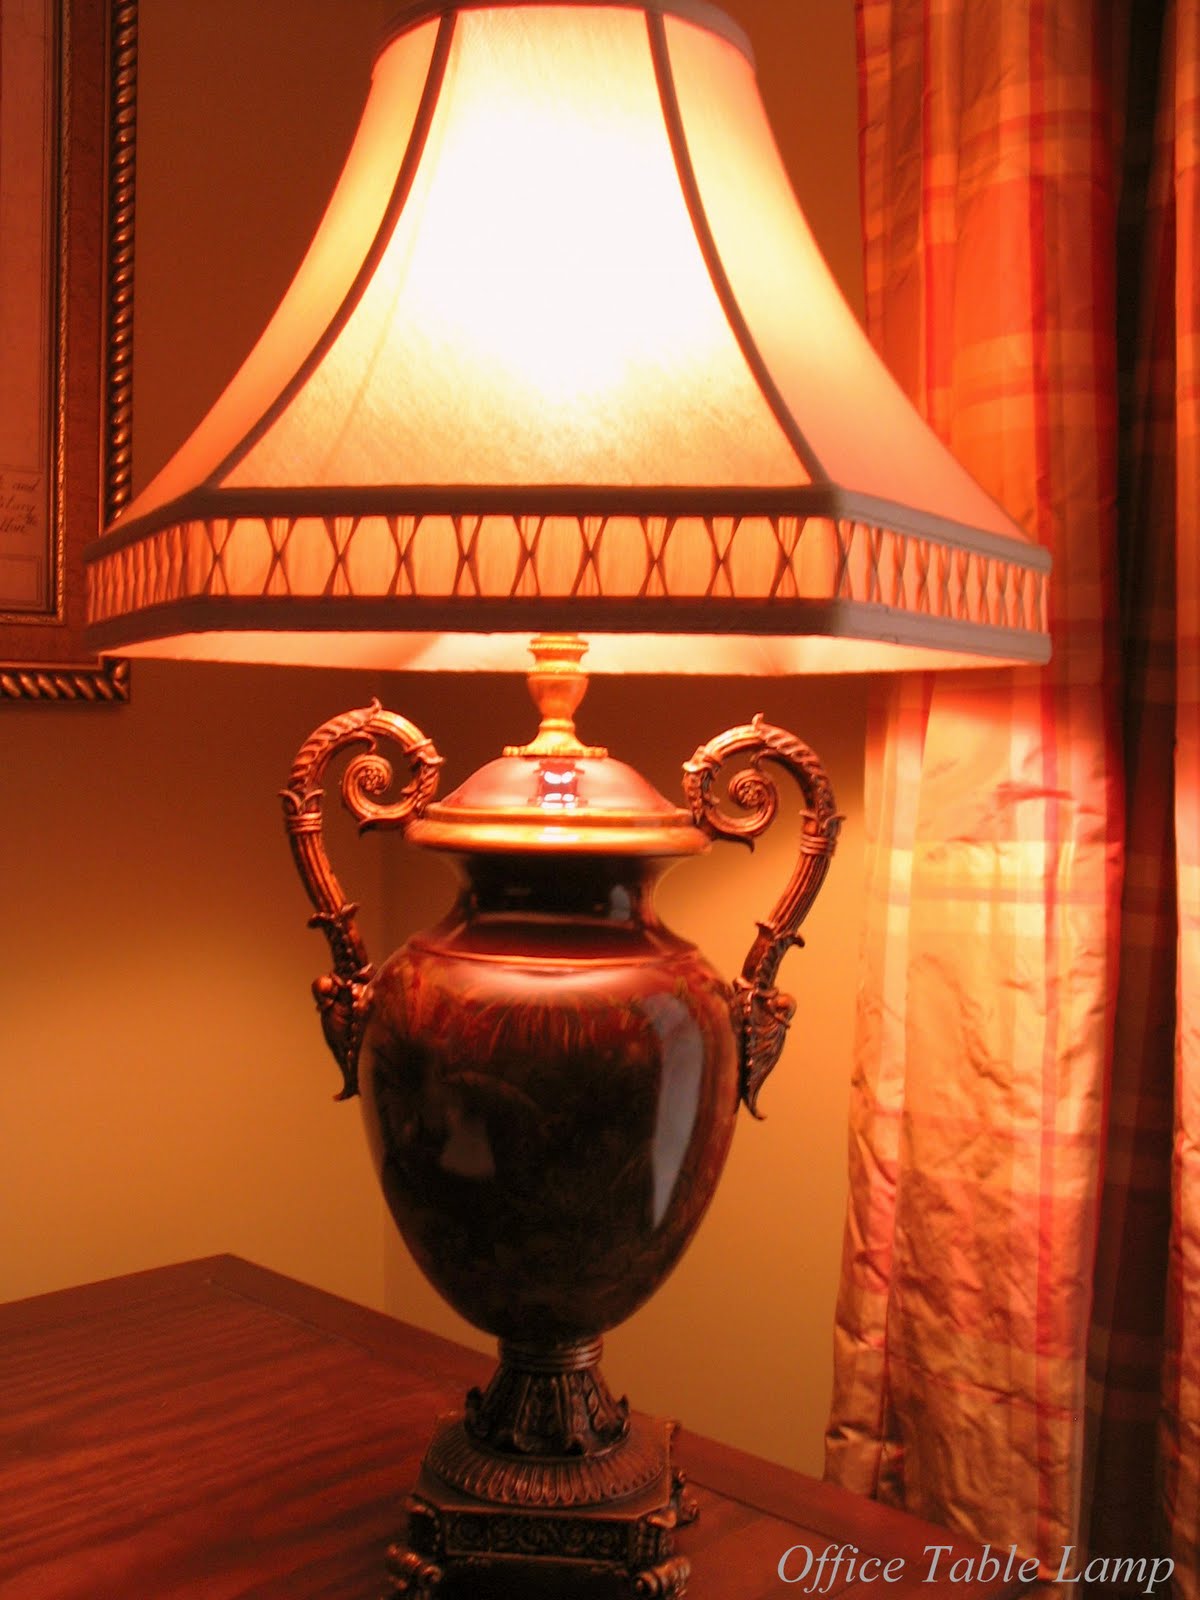
For instance, under-cabinet lighting in a kitchen can be both accent (especially if low wattage) and task lighting (helping with food preparation).  Table lamps, chandeliers and wall sconces that are typically task or general lighting sources become accent lighting (or “mood” lighting) with the combination of a dimmer switch and dark, romantic shades (as with the table lamp in the photo to the left).  In fact, I'm a firm believer in installing dimmer switches wherever possible for maximum flexibility in lighting your home.  It's an easy (and inexpensive) thing to do and the payoff is fabulous.


KEY TAKEAWAYS AND ADDITIONAL TIPS AND POINTERS
  • To be well-designed, a room should include some combination of general, task, and accent lighting.  Also, experiment with using uplights to give a room more visual interest.
  • Where possible, try to have the floor lamps, table lamps and any other task lighting within a room at the same approximate height off of the floor.  This will give a more even distribution of light throughout the room and will also appear less disjointed.
  • Wall-mounted swing-arm lamps are a great way to add light over a sofa or headboard without taking up floor space or table space, and they are often available with wall-mounted cord covers.
  • When lighting artwork, consider the investment you have made in the piece and make your choices accordingly.  Do ensure that the source of light is effective but not distracting or obtrusive.  Also, if your artwork is covered with glass, do consider removing it to enhance the picture and the effect of the lighting.
  • A small table lamp with a low-wattage bulb will add a warm and inviting glow to the hard surfaces and harsh lighting of a bathroom.  Try it sometime.
  • Use low-voltage strip lighting to add accent light to the dark spaces above a television or china cabinet or above a kitchen soffit.
  • Install dimmers for as many light fixtures as possible for maximum lighting options (including ceiling fixtures, table lamps, spotlights and sconces).
  • Do consider carefully what style and color of lamp shades to use and, where appropriate, whether to use them at all.  For instance, shades used on a crystal chandelier can be truly lovely (see the first photo above), but know that one effect of their use is that the crystals won't sparkle quite as much as they would without shades.  I'll include more about lamp shade options in a future post.
  • If you have a particularly large wall mirror (for instance, over a bathroom vanity), try mounting electric sconces directly onto the mirror for a sparkling and elegant look.   This will not only add additional illumination due to the reflection of the light in the mirror; it will also allow you to have a larger mirror while still having room for wall-mounted lights (which many find preferable for lighting above a vanity).
  • Do realize that all lighting has “cool” (meaning blue) or “warm” (meaning yellow) undertones and can have a significant impact on the appearance of the colors in your room.  For instance, traditional incandescent bulbs cast a more yellowish light, while GE “Reveal” light bulbs have a blue tint to counteract the yellow.  Likewise, halogen lights emit a clean, white light.   Whichever option you choose (I tend to prefer pure white light), try to use that option consistently throughout the room.

CONCLUSION

Good lighting is every bit as essential to interior design as is furniture placement and cohesive planning.  After all, the impact of carefully chosen fabrics, colors and accessories can be greatly diminished without proper consideration for how such details are lit.

Lighting your home effectively and creatively just takes a little thought and imagination.  I hope that this post has inspired you with ideas for your own home.   I hope you'll also take advantage of the information in the  Resource Guide below for some of my favorites sources for lighting and lighting accessories.


RESOURCE GUIDE

* = Available to the trade only (but it's relatively easy to purchase through an interior decorator).

*Decorative Crafts:  Chandeliers, lamps, sconces, lanterns.

Euro Style Lighting:  Contemporary lamps, sconces, chandeliers.

The Federalist:  18th century handmade reproduction lighting fixtures.  Very special, high-end chandeliers, sconces, table and floor lamps, lanterns, and ceiling fixtures.

Fine Art Lamps:  Chandeliers, sconces, pendants, lamps.

House of Troy:  Good source for art and picture lights; some floor and table lamps, as well as swing-arm lamps.

* John-Richard:  High-end chandeliers and lamps.


Light 'n Leisure:  Discount lighting.  Good selection.  They are able to special order a wide variety of brand name fixtures and will provide very competitive price quotes upon request.


Lighting Universe:  They have ALL kinds of lighting.

Nulco Lighting:  Chandeliers, sconces, ceiling fixtures.

Schonbek:  Stunning crystal chandeliers at a wide variety of price points, depending on quality of crystal (i.e., Swarovski, handcut, etc.).  Sconces and some table lamps.

Shades of Light:  Lamp shades, sconces, art lights, spotlights, chandeliers, floor and table lamps, swing-arm lamps, ceiling fixtures.
Copyright 2010 - All rights reserved - Pamela Yeaton

Friday, March 26, 2010

PDQuick! Under-bed Storage

PDQuick Tip:  We all know that you can never have enough storage, and one of the most popular places to store things is under the bed.  Try using an old bureau drawer to make under-bed storage efficient and easily accessible.   Simply attach rolling casters to the bottom and you've got a solid, deep storage unit that is easy to retrieve when you need it.  I've seen old individual drawers at yard sales and I've even seen new drawers being sold individually at the "tent sales" of major furniture dealers for as little as a dollar each.  Next time you see one, buy it!  Now you'll know what to do with it.

If you don't have an old bureau and can't find bureau drawers and you're a little handy, you can get the same result by making your own sturdy wooden box and adding casters.

Whichever option you choose, just don't forget to cover the top with fabric or a sheet (or even an old blanket).  This will protect the garments from dust and the inevitable pet fur if you have cats that like to lounge under the bed!
Copyright 2010 - All rights reserved - Pamela Yeaton

Thursday, March 18, 2010

Doorways and Entryways

SYMBOLISM OF DOORWAYS AND GATEWAYS

Doorways, gates and entryways have come to symbolize many things to many people throughout history:  The colossal Arc de Triomphe in Paris was conceived by Napoleon I in 1806 as a tribute to his armies and still serves as an enduring symbol of French patriotism.  The Brandenburg Gate of Berlin contains details representing the virtues of statesmanship and friendship, along with symbols of warfare and reconstruction in German history.  The so-called “Traitors Gate” served as a foreboding “welcome” to those doomed to enter the Tower of London for ultimate execution.

Indeed, the symbolic importance of the doorway dates back to ancient times, and was significant enough that the Romans even identified the pagan god “Janus” as being a protector of entrances, doors and gateways.  As such, he is typically depicted as having two faces:  One face looks backward (as in from where he has been) and one face looks forward (as in where he is going, or into which he is entering).  One of the most famous gateways featuring Janus's likeness is the Ianus Geminus in Rome, found on the Forum Romanum.  The meaning of this gateway could not have been more important, literally symbolizing war (when the gates were open) and peace (when the gates were closed). 

Such entrances were designed to “make a statement” about the place in which they were located or the people whom they represented.  In the above examples, they succeeded admirably.  Certainly, the symbolism of such entryways was not lost on people.  The Arc de Triomphe, for example, saw victory marches pass beneath its massive confines by the Germans in 1940 signaling their occupation of Paris, and by the triumphant French and her Allies in 1944 and 1945 following France's liberation.

While various elements go into defining a building's or a home's particular architectural style (such as house shape, roof style and window configurations), no element is more significant than the front entrance or doorway.  With the possible exception of the more elaborate Victorian styles, doorways are the focal point of the home, the place where much of the home's (and the homeowner's) character, personality and aspirations are concentrated.


DOORWAYS INTO AMERICA'S ARCHITECTURAL HISTORY

Just as such doors and gateways were never “just doors” in the ancient world or in European history, so too did significant architectural movements within the United States often have symbolic overtones.

Early architectural styles in America predictably mimicked what colonists had seen in their native Europe.  This is especially evident in the housing found on the northeast coast (which was settled by the British); in Mississippi and Louisiana (settled by the French); and in Florida and California (settled by the Spanish).   Later styles would continue to be inspired by European design.  However, as we shall see, they also began to reflect a more uniquely American perspective that was based on the new republic's self-image and growing prosperity, with one such example being the Georgian Colonial.

Georgian Colonial:  Rise of the Middle Class
The “Georgian Colonial” of the 17th and early 18th centuries showed greater detail and intricacy than earlier colonial architecture.  Reflecting the new-found wealth of colonial life and the rise of a middle class seeking
to display its new-found status, such houses “borrowed” from the classicism of England.  The doorways of the Georgian Colonial, as represented in photo 1 to the left and photo 2 to the right, typically displayed more detailed and elaborate pediments above the door itself, as well as flattened columns (or pilasters) flanking the sides of the door.    Both of the photos shown here show a minimal amount of glass, although the door to the right, in particular, has an intricately carved and curved pediment that is crowned with a gilded pineapple ornament.  In the meantime, also worth noting in the photo to the left is the striking contrast of the bright coral color of the six-paneled door against the cream color of the rest of the home's exterior.  Against the home's otherwise staid and classical exterior, this shot of color provides a real pop of personality that makes this beautiful home guaranteed to get noticed.

Neoclassical and Federal Styles:  Embracing Democratic Philosophies of Ancient Civilization
After the Revolutionary War, the so-called “Federal” and “Greek Revival” styles of architecture reflected a new and independent republic that was forging its own identity.   The prevalence of neoclassicism in the public structures of Washington, D.C. attests to this fact.  America's founding fathers, in embracing the architecture of ancient Rome and Athens, conveyed their vision of America as a symbol of the democratic philosophies and sensibilities of these ancient seats of knowledge and wisdom.  But such a vision was not limited to public structures.
On the domestic side, federal style homes were characterized by more elaborate designs and with more extensive use of glass than was found in earlier house styles.  In addition to decorative crowns or roofs above the door, doorways often had fanlights and sidelights, allowing more natural light to reach the home's interior entryway.  In the example in photo 3 to the right, the entryway possesses the rectangular transom often associated with the Georgian Colonial style.  However, the sidelights are characteristic of the Federal period, as is the portico that displays the doric and ionic columns and laurel wreath detailing of neoclassical design.  Much like the homeowner of the Georgian Colonial above, this homeowner has likewise used color to great effect.  The bright white of the entryway stands in sharp relief against the vibrant blue of this house's clapboard siding, with the resulting effect being that the entrance to this stately home stands front and center, immediately drawing the eye's attention.

The Romantic Movement and Victoriana:  Displays of Social Status
In sharp contrast to the classical lines of the Georgian and Federal styles that had gone before, by the mid-19th century the “Romantic Movement” was in full swing.  Comprising, in part, the Gothic and Italianate housing styles, this movement symbolized for American society both social status and triumph of the intellect.  While Gothic style homes were characterized in part by the decorative spires and elongated windows often seen in cathedrals, Italianate styles were modeled from the Italian Renaissance and often sported double doors and roman (or rounded) arches above windows and doors.  The home in photo 4 to the left is a lovely (and comparatively simple) example of the Italianate style, with its entry sporting double paneled doors, arched windows, and etched glass.  In addition, its portico of Corinthian columns and dentil molding gives this home an impressive entrance that never forgets its Greco-Roman roots as it evokes the temples of ancient civilization.  Italianate was probably the most sought-after house style in the United States in the 1860s, but would shortly give way to the popularity of the more whimsical Victorian style.

The Victorian era in America was one of rapid westward expansion and industrialism, rampant consumerism and new-found wealth.  Not surprisingly, the Victorian style homes that were built during this time, especially the type known as the “Queen Anne” style, were a testament to such new-found wealth and the desire of the homeowners  to “show it off”.

Perhaps one of the most famous examples of the late (or “high”) Victorian architectural style is the Hale
House in Los Angeles, California (see photo 5 to the right).  Built in the 1880s, Hale House exhibits just about every element of the Victorian housing style:  Vivid contrasting color, rounded turret, “fish-scale” shingles, stained glass and single-paned windows, highly intricate chimneys, and wood carvings and brackets too numerous to count.  Interestingly, unlike the other less “busy” architectural styles described above, the entry of Hale House is not the focal point of the home and is in fact almost an afterthought.  Indeed, the entry's peaked gable above the front veranda is dwarfed by the much larger peaked gable at the top of the house.  The double doors, meanwhile, are recessed, taking a back seat to the intricate carvings of the veranda's balusters.

As exemplified by the stunning Hale House, Victorian houses had become progressively more detailed and ornate as the 19th century drew to a close.  It was therefore not surprising that the perceived excesses of the era would eventually give way to simpler and "cleaner" designs, as was the case with the Colonial Revival.

Colonial Revival:  A Return to Classical Roots
Based loosely on Georgian and Federal styles, the so-called “Colonial Revival” that first appeared to the end
of the 19th century signaled not only a return to the classical style that characterized America's early architecture, but also an architectural backlash against Victorian sensibilities.  As exemplified by the home in photo 6 to the left, Colonial Revival doorways often had porticos with pediments, paneled doors with sidelights, and rectangular transoms or fanlights.  This home's sidelights also sport an intricate “tracery” that complements the spiderweb design of the fanlight above the door.

The Colonial Revival is actually a somewhat eclectic home style, combining features from past architectural eras with more recent ones.   While the Colonial Revival's heyday came to an end in the 1950s, elements of the style are still popular in today's more traditional homes.  In fact, many newly constructed homes have doorways (with or without porticos) that look like a simpler version of the Colonial Revival door pictured above.

With a little attention to detail, however, such newer doors could look a lot more historically authentic and more closely replicate many of the architectural styles discussed here.


MAKING YOUR DOORWAY YOUR OWN

Doorways say something about the style of a house, its history, and the personality of the homeowner. For instance, the doorway in photo 7 to the below right is so covered with ivy that it brings to mind the gate from the children's classic The Secret Garden.  It's easy to imagine fairy tale characters living within the confines of this particular home.

Doorways are an opportunity for people to “spread their wings” and tell us something about themselves, based on the degree of whimsy, ornateness and/or bold color choices.  Especially with today's prevalence of new homes built to specification, the doorway is a place where the homeowner can still customize relatively easily (even post-construction).

While you probably wouldn't want to deviate too drastically from your home's primary architectural style (by putting a Victorian style door on a Cape Cod or ranch style home, for instance), it is relatively easy to give a plain cookie-cutter Colonial, for example, some more elaborate Georgian or Federal style detailing by way of the entrance. And aside from adding elegance, such details add depth and richness to your home's focal point.  How you approach it all depends on the statement you want to make.

For instance, elements like lanterns and sconces, or architectural millwork such as pilasters, pediments and even columns (if you're a bit more ambitious) can transform the look of your doorway and, thus, your whole home.  Hardware, including doorbells, doorknobs, knockers, letter slots, rim locks and number plates, is another means of making your doorway stand out.  Door knockers alone come in myriad styles such as lion's head, pineapple, seashell and the traditional "doctor's knocker".  Not only does such hardware come in all variations of styles, from traditional to whimsical; there are also numerous finishes from which to choose, each of which will itself contribute to the overall effect.   Polished or burnished brass is very elegant, while bronze or weathered copper has a more casual, rustic feel.

You can even change out the entire door itself to more suit your style without completely replacing the doorframe or, if the interior ceiling height above your doorway is sufficient, add a transom window.   If your budget is really tight, you can still make a big change in your doorway simply by updating the paint color.  If the rest of your house is muted or neutral in color, consider opting for a bold, contrasting color on the front door, as in the Georgian Colonial pictured above.

All of these elements are available at various price points, from the most custom, high-end materials to mass-produced items that can not only make a statement but look great too.   Be sure to check out the “Resource Guide” below for some great sources where you can find everything you'll need to create the doorway you want.  In addition, don't forget to check out architectural salvage yards, which can be a great place to find antique, one-of-a-kind windows and moldings for your project. 


CONCLUSION

I have not attempted to cover every style in America's rich architectural history.  Still, I hope that I have provided some interesting information and background on the historical inspirations behind some of these styles, as well as some “food for thought” about how your own entryway can be modified and accessorized to better reflect you.

RESOURCES GUIDE:

HISTORIC PAINT COLORS:

Pratt and Lambert 
Farrow and Ball
Benjamin Moore
Valspar (available at Lowes)

EXTERIOR DOORS:

Expensive custom doors:  Amherst Woodworking
Less expensive:  Select Door 
Mass manufactured:  Simpson Door Company 
Transoms, hardware and doors:  Cambridge Doors & Windows

MILLWORK/ARCHITECTURAL DETAIL:

Worthington Millwork
Melton Classics
4specs.com (List of online sources for composite architectural elements and features.)
Chadsworth Incorporated (columns, pediments, entryway systems)

HARDWARE AND EXTERIOR LIGHTING:

House of Antique Hardware
Renovator's Supply
Signature Hardware
Rejuvenation
Lighting Universe

ADDITIONAL RESOURCES:

OldHouses.com  (list of restoration suppliers and services)
www.oldhouseweb.com (links to everything from antique doors suppliers to architectural salvage, lighting and hardware)

Photo credits:
Photo 1: Georgian Colonial front door, Newport, RI. Copyright 2010 Pamela M. Yeaton. All rights reserved.
Photo 2: Georgian Colonial front door, Newport, RI. Copyright 2010 Pamela M. Yeaton. All rights reserved.
Photo 3: Federal style front door and portico, Newport, RI. Copyright 2010 Pamela M. Yeaton. All rights reserved.
Photo 4: Italianate style home, Newport, RI. Copyright 2010 Pamela M. Yeaton. All rights reserved.
Photo 5: Victorian style "Hale House", Los Angeles, CA. Photo used by permission and license of The City Project.
Photo 6: Colonial Revival style front door and portico, Newport, RI. Copyright 2010 Pamela M. Yeaton. All rights reserved.
Photo 7: Ivy-covered door in Portsmouth, NH. Photo used by permission and license of hmmlargeart. 
Copyright 2010 - All rights reserved - Pamela Yeaton

Wednesday, March 10, 2010

PDQuick! A Room with a View

PDQuick Tip: If you're unhappy or dissatisfied with a room in your house but can't quite put your finger on why, consider taking some photographs of the room.  Sometimes what we can't see when we are present "in" the room due to various distractions and visual stimuli becomes clear as day when viewed through the objective lens of the camera.  You might be surprised.

Speaking from experience, I had a client with a room in her house that had frustrated her for years.  Although the room had great architecture, a vaulted ceiling and beautiful furnishings, there was just something about it that continued to miss the mark.  The room should've been perfect, but it wasn't.  After taking several photographs of the space from various angles, it became apparent to me that the problem was mostly that the cool undertones of the wall color were "fighting" with the warmer tones of the fabrics on the furnishings.  Once we "warmed up" the walls with a richer, more saturated paint color, the room appeared more cohesive.  Problem solved.

Give it a try!
Copyright 2010 - All rights reserved - Pamela Yeaton